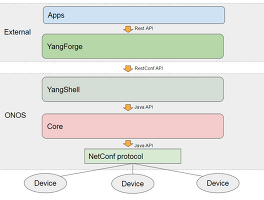
ONOS ml2 mechanism driver 연결
ONOS Controller도 여타 컨트롤러와 같이 OpenStack과 연동하는 메커니즘을 개발하고 있다.
Huawei에서 주도적으로 개발하는 이 서브시스템들은 동시에 netowrking-onos라는 프로젝트로 Neutron에도 개발되고 있다.
아직은 매우 불안정하고 미완성이다.
본 포스팅에서는 ONOS (origin/master, 1.4.0) 버전과 OpenStack Kilo 버전을 그 대상으로 한다.
(물론 ONOSFW에서 권고하는 사항은 OpenStack Liberty 버전이다.)
Reference는 다음과 같다.
- http://forum.onosfw.com/t/how-to-integrate-onos-master-1-4-0-with-openstack-kilo/80
- https://www.youtube.com/watch?v=qP8nPYhz_Mo
OpenStack과 ONOS 연동
1. networking-onos
1.1 install networking-onos
- OpenStack Version : Kilo
- Control Node
$ sudo apt-get install python-pip
$ sudo pip install networking_onos
$ cd /usr/local/lib/python2.7/dist-packages/networking_onos

1.2 edit config neutron
- Control Node
- Copy to installed networking-onos directory and paste openstack neutron plugins drivers
- edit entry_points.txt (neutron-2015.1.1-py2.7.egg-info)
[파일 확인 및 내용 복사]
$ sudo vi /usr/local/lib/python2.7/dist-packages/networking_onos-1.0.0.dist-info/entry_points.txt
[파일 수정]
$ sudo vi /usr/lib/python2.7/dist-packages/neutron-2015.1.1.egg-info/entry_points.txt
[파일 내용 추가]-----------------------------------------
...
[neutron.ml2.mechanism_drivers]
...
onos_ml2 = networking_onos.plugins.ml2.driver:ONOSMechanismDriver
...
[neutron.service_plugins]
...
onos_router = networking_onos.plugins.l3.driver:ONOSL3Plugin
...
- edit ml2_conf.ini
- /etc/neutron/plugins/ml2/ml2_conf.ini
$ sudo vi /etc/neutron/plugins/ml2/ml2_conf.ini
[파일 내용 변경]--------------------------------------------
...
mechanism_drivers=onos_ml2
...
-----------------------------------------------------------
[파일 확인 및 내용 복사]
$ sudo vi /usr/local/etc/neutron/plugins/ml2/conf_onos.ini
[파일 수정]
$ sudo vi /etc/neutron/plugins/ml2/ml2_conf.ini
[파일 내용 추가]--------------------------------------------
...
[onos]
url_path = http://<ONOS Controller IP>:8181/onos/vtn
username = karaf
password = karaf
-----------------------------------------------------------

1.3 Restart neutron-server
$ neutron-db-manage --config-file /etc/neutron/neutron.conf --config-file /etc/neutron/plugins/ml2/ml2_conf.ini upgrade head
$ sudo service neutron-server restart
2. ONOS Feature Install
2.1 start ONOS Controller
- ONOS Version : origin/master (1.4.0)
- ONOS Controller
$ . ~/.bash_profile
$ cd onos
$ mvn clean install
$ onos-karaf clean
onos> feature:install onos-ovsdatabase
onos> feature:install onos-app-vtn-onosfw
3. OpenStack OVS connect ONOS
3.1 OpenStack Network/Compute Nodes
$ sudo ovs-vsctl set-manager tcp:<ONOS IP>:6640
3.2 Check Tunnel
$ sudo ovs-vsctl show
7bd8744b-3d53-4d8f-ad3e-a51d3c78fe95
Manager "tcp:192.168.56.10:6640"
is_connected: true
Bridge br-int
Controller "tcp:192.168.56.10:6653"
is_connected: true
fail_mode: secure
Port "vxlan-192.168.56.40"
Interface "vxlan-192.168.56.40"
type: vxlan
options: {key=flow, local_ip="192.168.56.30", remote_ip="192.168.56.40"}
Port br-int
Interface br-int
type: internal
ovs_version: "2.3.2"
$ sudo ovs-vsctl show
21a339e2-a4cf-4ff0-97ed-7940bf8d07c7
Manager "tcp:192.168.56.10:6640"
is_connected: true
Bridge br-int
Controller "tcp:192.168.56.10:6653"
is_connected: true
fail_mode: secure
Port br-int
Interface br-int
type: internal
Port "vxlan-192.168.56.30"
Interface "vxlan-192.168.56.30"
type: vxlan
options: {key=flow, local_ip="192.168.56.40", remote_ip="192.168.56.30"}
ovs_version: "2.3.2"
터널은 정상적으로 연결된 것으로 보인다.
단, openvswitch mechanism driver를 사용하는 경우 br-int/br-tun이 구분되었는데 br-int에 터널 포트를 생성하는 것을 확인하였다.
4. Tunnel Check Flows (OpenFlow)
OVSDB를 사용하여 Tunnel 연결에 대한 제어를 하게되는데 openvswitch 플러그인이나 [OVS] 섹션이 없는 경우 br-tun 브릿지가 생성되지 않기 때문에 확인에 조금 어려움을 느낀다.
Network/Compute 노드의 br-int 브릿지를 활용하여 터널링을 지원하기 때문에 br-int의 Flow 정보를 살펴보아야 한다.
$ sudo ovs-ofctl dump-flows -O openflow13 br-int
OFPST_FLOW reply (OF1.3) (xid=0x2):
cookie=0x2d0000807a0678, duration=975.957s, table=0, n_packets=0, n_bytes=0, send_flow_rem priority=0 actions=goto_table:50
cookie=0x1000082b6aa90, duration=975.906s, table=0, n_packets=312, n_bytes=25272, send_flow_rem priority=40000,dl_type=0x88cc actions=CONTROLLER:65535
cookie=0x10000807b9861, duration=975.897s, table=0, n_packets=0, n_bytes=0, send_flow_rem priority=5,ip actions=CONTROLLER:65535
cookie=0x1000082b6b8da, duration=975.906s, table=0, n_packets=312, n_bytes=25272, send_flow_rem priority=40000,dl_type=0x8942 actions=CONTROLLER:65535
cookie=0x1000082c61296, duration=975.897s, table=0, n_packets=0, n_bytes=0, send_flow_rem priority=40000,arp actions=CONTROLLER:65535
cookie=0x10000807b991b, duration=975.908s, table=0, n_packets=0, n_bytes=0, send_flow_rem priority=5,arp actions=CONTROLLER:65535
cookie=0x2d0000807a06aa, duration=975.957s, table=50, n_packets=0, n_bytes=0, send_flow_rem priority=0 actions=drop
$ sudo ovs-ofctl dump-flows -O openflow13 br-int
OFPST_FLOW reply (OF1.3) (xid=0x2):
cookie=0x2c0000d242d785, duration=22.933s, table=0, n_packets=0, n_bytes=0, send_flow_rem priority=0 actions=goto_table:50
cookie=0x10000d47f7b9d, duration=22.933s, table=0, n_packets=7, n_bytes=567, send_flow_rem priority=40000,dl_type=0x88cc actions=CONTROLLER:65535
cookie=0x10000d244696e, duration=22.933s, table=0, n_packets=0, n_bytes=0, send_flow_rem priority=5,ip actions=CONTROLLER:65535
cookie=0x10000d47f89e7, duration=22.932s, table=0, n_packets=7, n_bytes=567, send_flow_rem priority=40000,dl_type=0x8942 actions=CONTROLLER:65535
cookie=0x10000d48ee3a3, duration=22.932s, table=0, n_packets=0, n_bytes=0, send_flow_rem priority=40000,arp actions=CONTROLLER:65535
cookie=0x10000d2446a28, duration=22.932s, table=0, n_packets=0, n_bytes=0, send_flow_rem priority=5,arp actions=CONTROLLER:65535
cookie=0x2d0000d242d7b7, duration=143.792s, table=50, n_packets=0, n_bytes=0, send_flow_rem priority=0 actions=drop
1) ovsdatabase 사용
- 터널을 생성하게 되는데 OpenStack에서 기본 생성되는 브릿지인 br-int를 사용하여 터널을 생성함
- 이 경우 터널 네트워크는 management network를 사용함
- data network를 사용하지 않아서 그런지 몰라도 Flow가 active/pending 상태를 반복함
2) ovs-vsctl set-manager tcp:ONOS_IP:6640
- 위 명령이 실행됨과 동시에 터널이 생성되고 Flow가 만들어짐
- 문제는 OpenStack 각 노드에 생성이 되어야 하는데 OVS를 사용하는 모든 부분에 터널이 생성됨
- 즉, 물리적인 OF SW를 OVS를 이용하였다면 ovs-vsctl set-controller bridgename tcp:ONOS_IP:6633을 하는 경우 터널 연결을 시도하게 됨
- OpenStack의 network/compute 노드들 사이에 터널이 생성되어야 함